With DojoExpert you can easily manage your instructors. In this tutorial, you will learn how to:
Add instructors
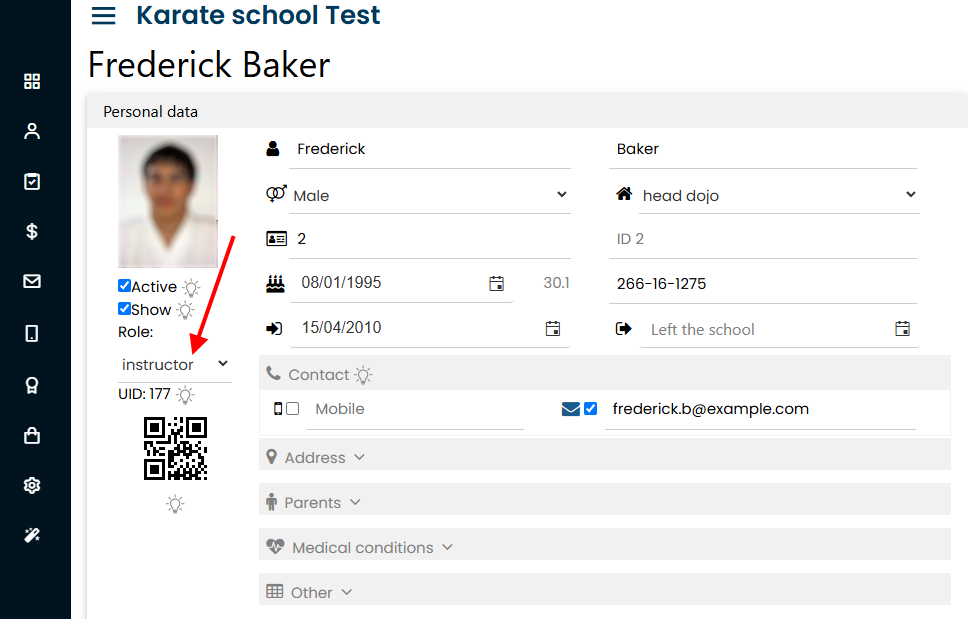
Add an instructor as you would a regular member, then change their role to "instructor". You can also open an existing member's profile and change their role:
Create a login and set access levels
Find your instructor list under "Classes". It includes class enrollments, login access, and schedules. You can also add instructors here, which creates a member with the "instructor" role:
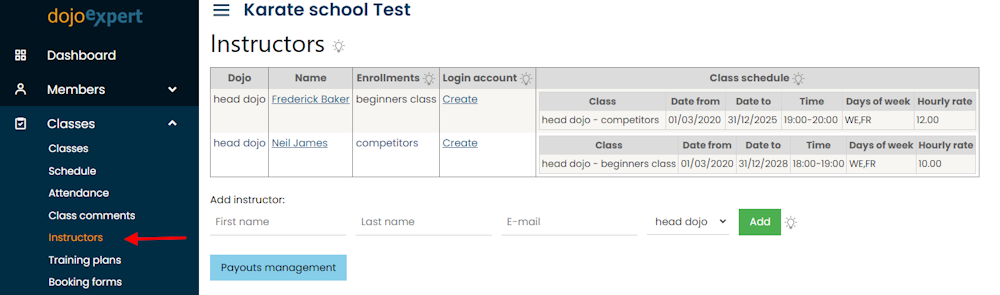
To give an instructor access to DojoExpert and the mobile app, click "create" in the "login account" column. On the Settings page, create the login account. Their email address becomes their username, and a random password is generated, which you can change. Set their access permissions here:
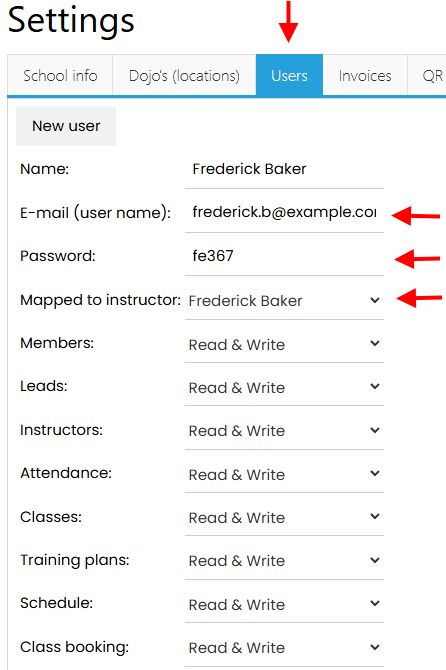
For example, to let an instructor record attendance and post class comments from their phone, give them "read & write" access to "Attendance". If all other sections are "hidden", only the "Attendance" menu will be available to them in the mobile app.
Assign instructors to classes
Go to class settings and add:
- Class enrollment
- A class schedule with an assigned instructor
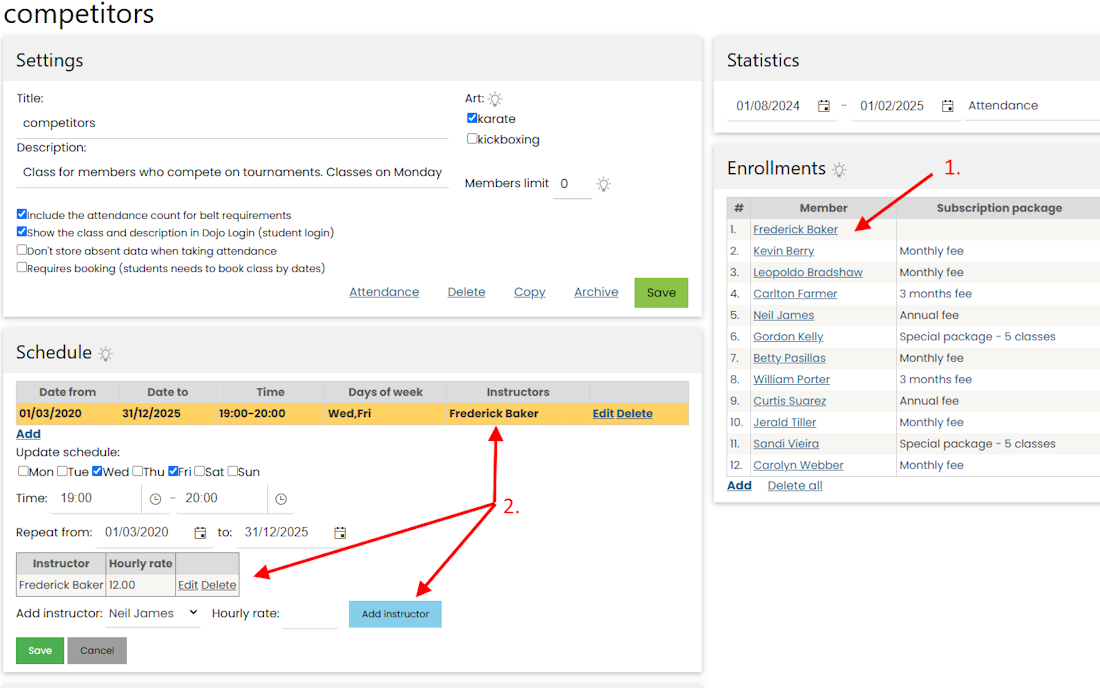
Enroll instructors in classes to track their attendance. Add them to the class schedule with an hourly rate to calculate payouts from check-ins or scheduled hours.
Calculate and create payouts
To calculate payouts, open "instructors" and click the blue "payouts" button. Add a payout by selecting an instructor and the date range:
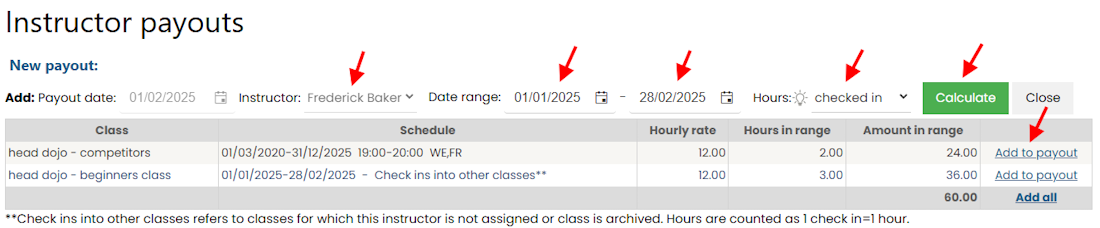
This example calculates instructor Frederick Backer's payout for January 2025. In "checked in" mode, the system uses attendance during the selected period and the hourly rate set earlier. In "scheduler" mode, it uses all scheduled hours, regardless of check-ins. Click "calculate" to display the results. Review the rows and click "add to payout" in the last column for each item you want to include. Added rows move to the payout items table, where you can edit the rate, hours, or class description:

When finished, click "Close". The payout appears in the main table, grouped by date and instructor:
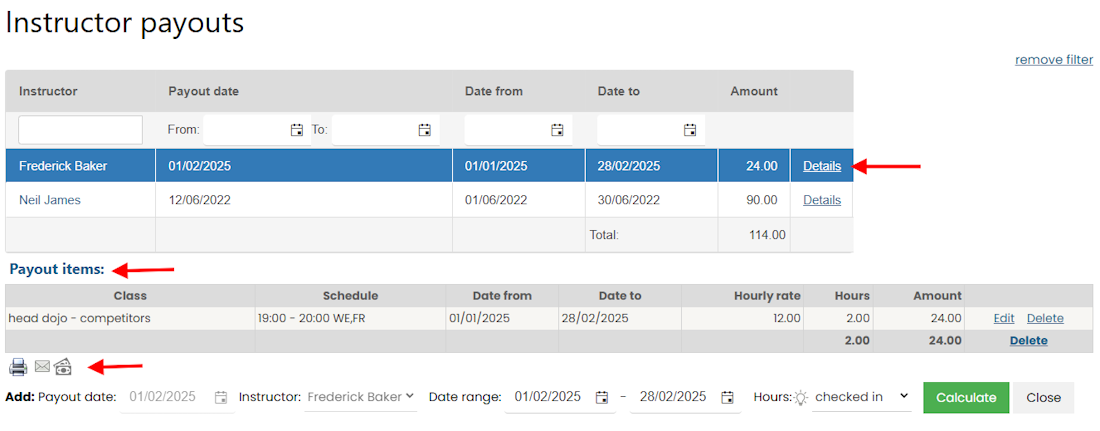
Click "details" in the main table to view, edit, add, or delete payout items.
Print or send payout notifications
Select a payout to display its items. Three icons appear below the table, as shown in the previous screenshot:
- Print - opens a print-friendly payout report
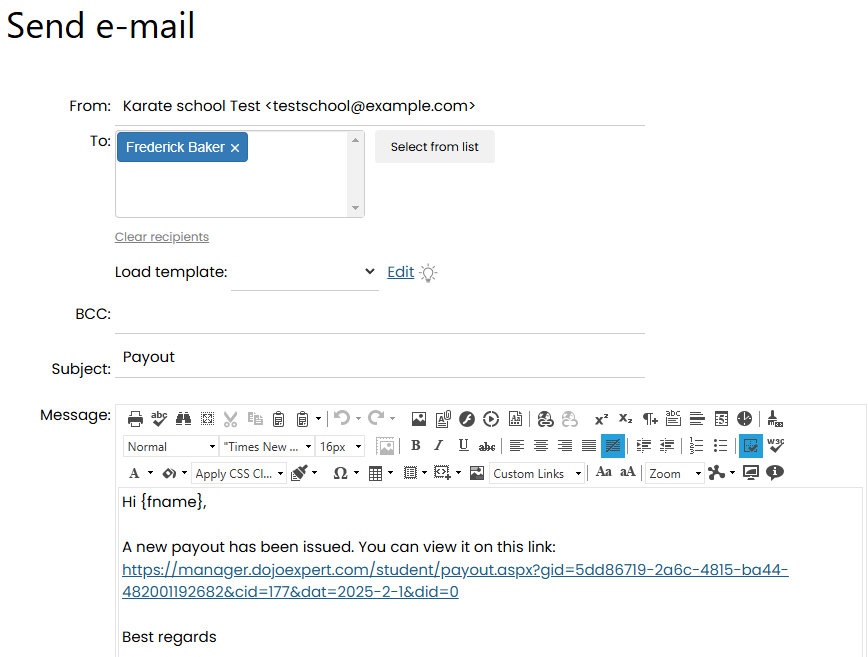
- Email - opens the email interface with a link to the payout, ready to send to the instructor
- Add to costs - adds the payout amount to your Costs & revenues section
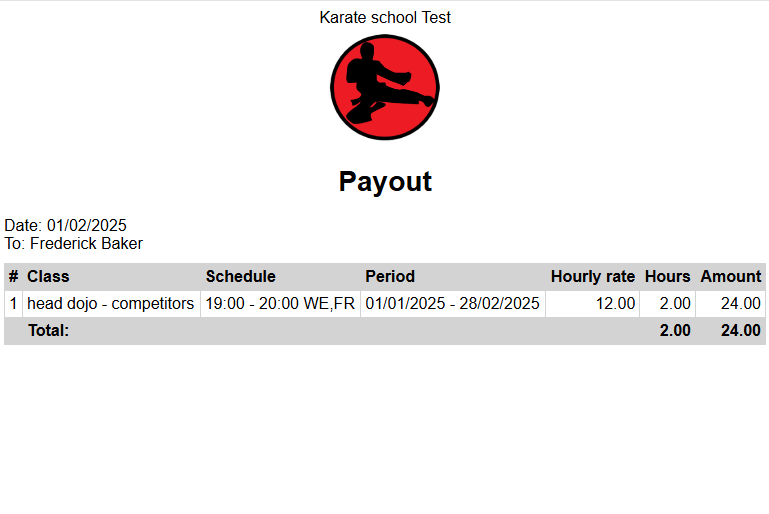
Monitor attendance
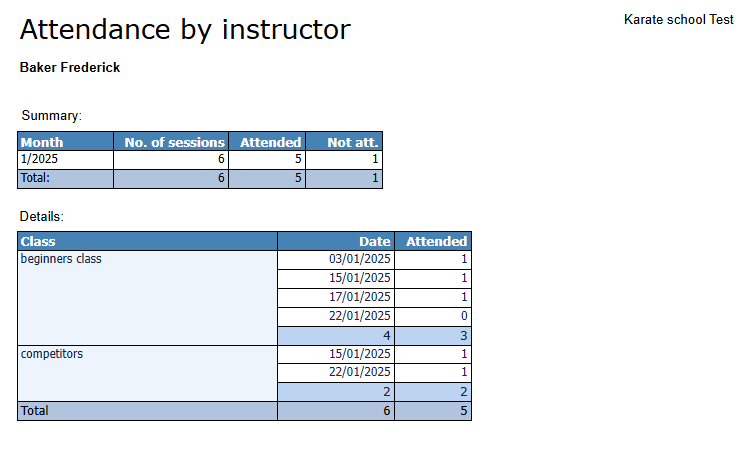
Use the Attendance report at the bottom of the Payouts page to load the list of check-ins per instructor: