Open “Leads” under “Members” in the main menu to manage prospective members. This guide explains:
- what leads and lead sources are
- how to add leads
- types of leads
- how to collect leads through web forms
- how to convert a lead to a member
- how to run lead reports
- how to send emails to leads
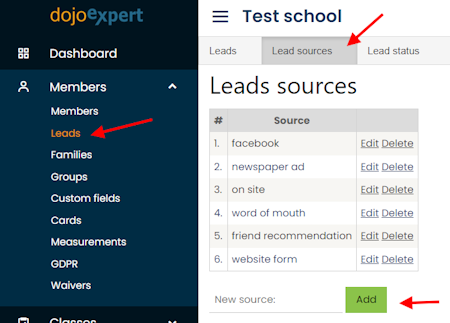
Before adding your first lead, set up your lead database. Start with lead sources: where your leads come from. Here are some examples, but you can add any sources you need:
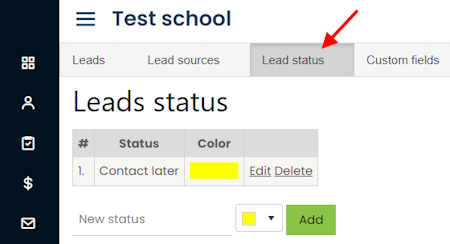
There are three default lead statuses, which you cannot change:
- active (lead with potential to convert)
- lost (not interested or any other reason)
- converted (became a member)
Add custom statuses as needed and assign a color to each. Default statuses use green for converted, red for lost, and white for active. For example, add "contact later" in yellow:
The lead database includes standard fields such as name, phone, email, status, and source. Add fields specific to your school in "custom fields", such as a "date of birth" field:
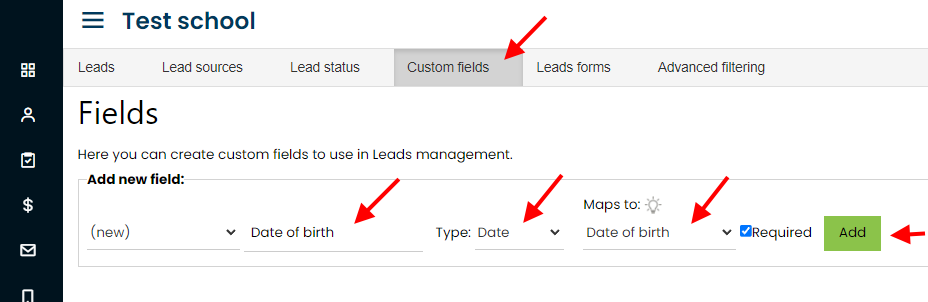
For each custom field, choose the data type, the corresponding member field to use when converting the lead, and whether the field is required on lead forms.
Go to "Leads" and click "Add" to create a lead. Your custom fields, sources, and statuses are available on this screen:
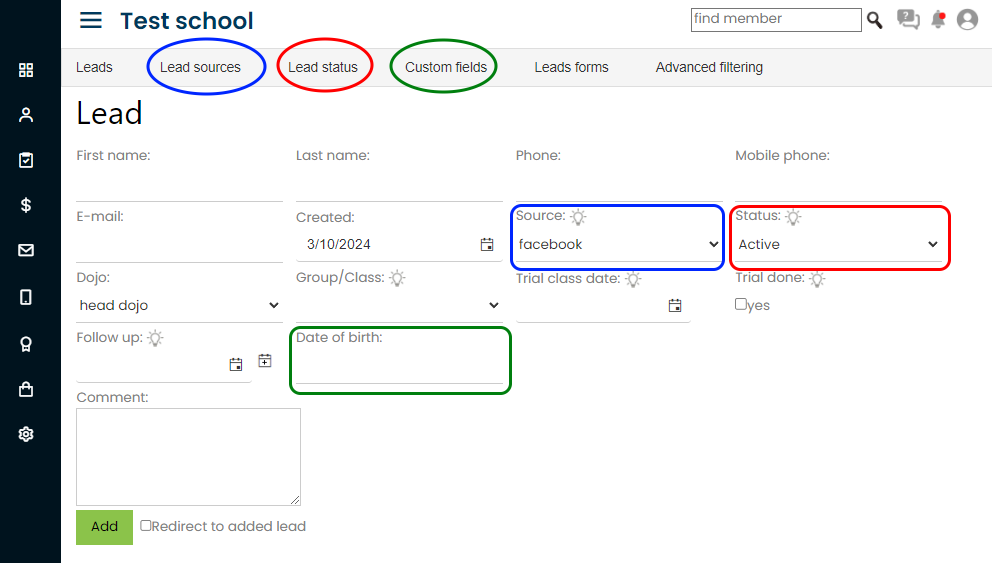
Other important fields on this screen are:
- Group/Class - the class the lead is interested in or will join when converted
- Trial class date - the date of the lead's trial class
- Trial done - whether the lead attended the trial class
- Follow up - the date you want a reminder to take an action, such as calling the lead
Your lead database might look like this:
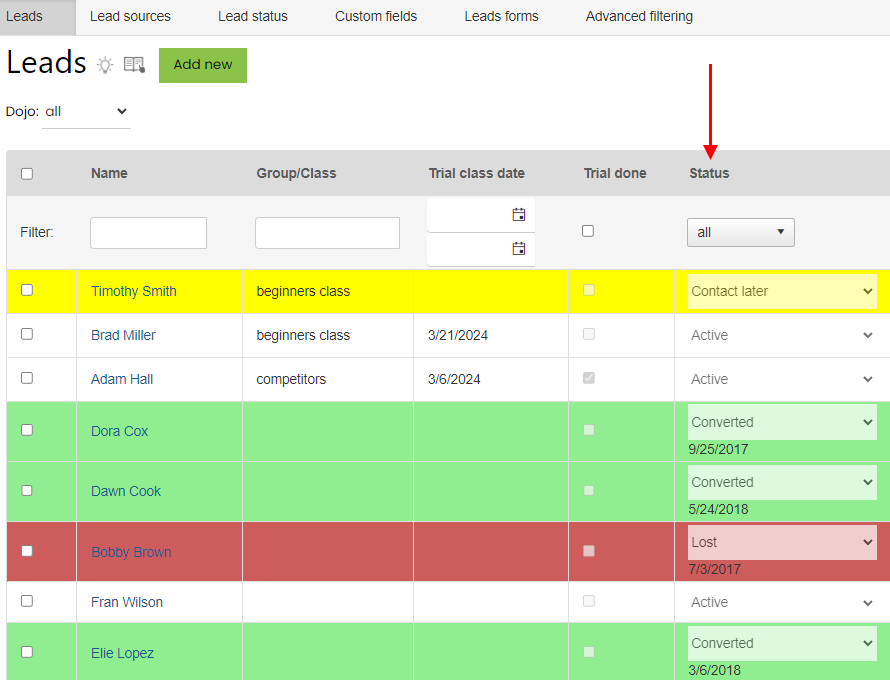
Colors indicate status: green for converted members, red for lost leads, and yellow for the custom status we added earlier.
Converting a lead
When a lead joins your school, convert them to a member. Their details are copied to the member database, and their lead status changes to "converted" (green). The lead profile shows the conversion date and a green UID. Click the UID to open the member profile.
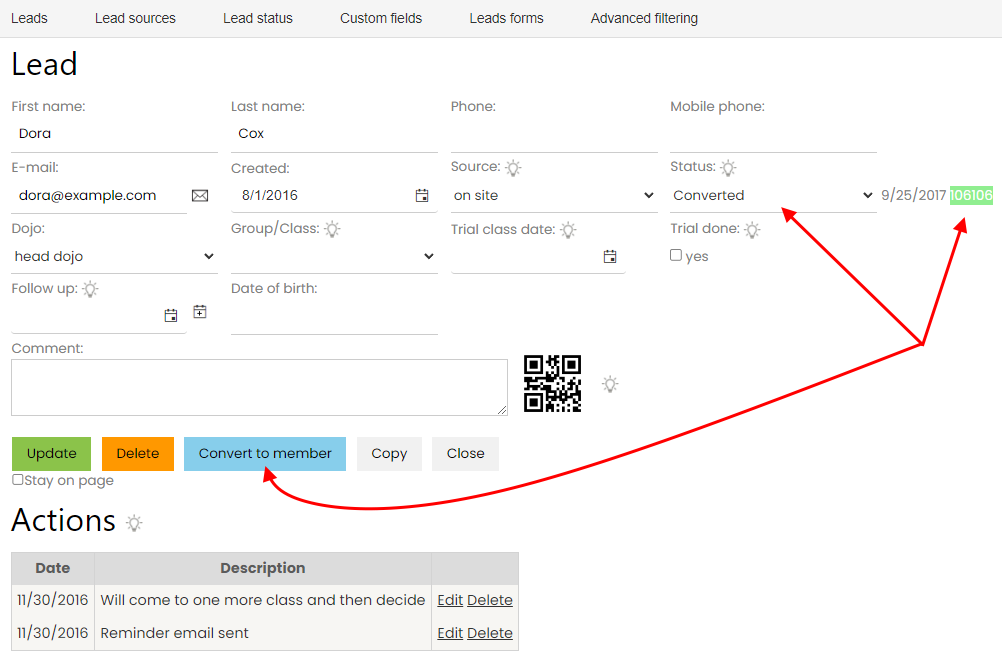
Use “add action” to record short notes about your interactions with a lead, such as a phone call. The “last action” column on the lead list displays the most recent entry.
Set a date in "Follow up" to schedule an action for a lead. Filter by this date to see which leads need attention each day. DojoExpert also displays a dashboard reminder on the follow-up date.
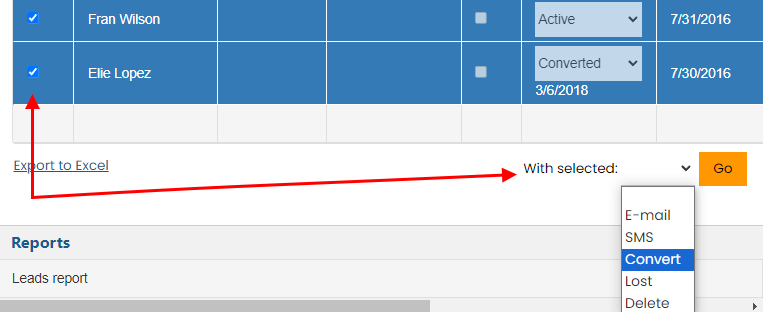
To act on multiple leads, select them in the table and use the bulk actions dropdown below it. Options include converting, deleting, and emailing leads.
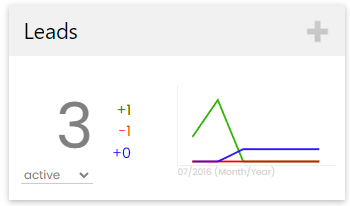
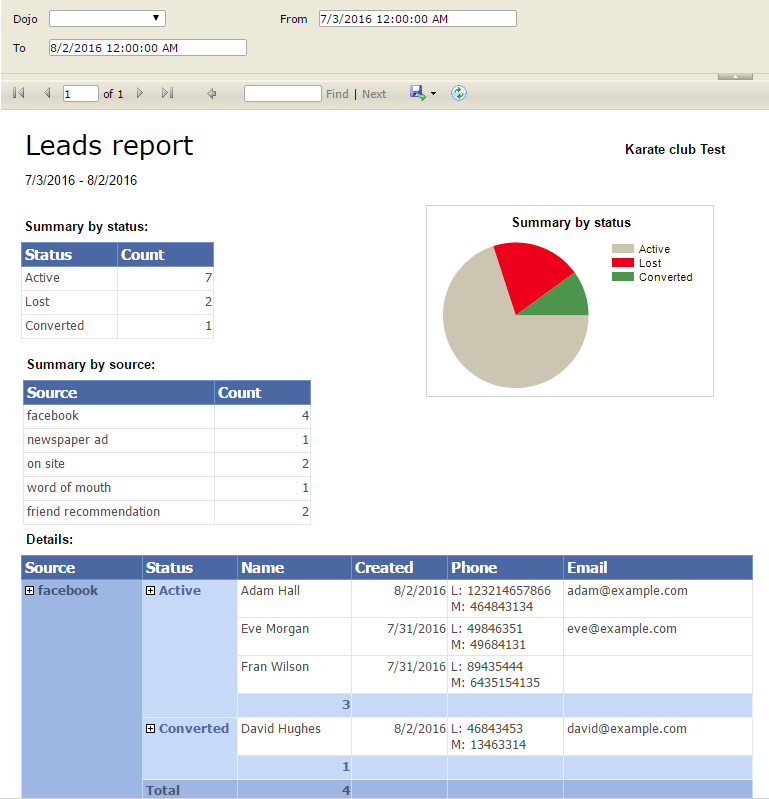
View lead statistics in the Leads report or the dashboard chart:
Forms to collect leads
Create lead forms with different fields, text, and colors, then embed them on your website so visitors can register. Manage all collected leads in DojoExpert.
Select “leads”, then "leads forms" in the top menu to find your forms.
Enter a title and click “add” to create a form, or click “edit” to modify an existing one. The example below explains the fields:
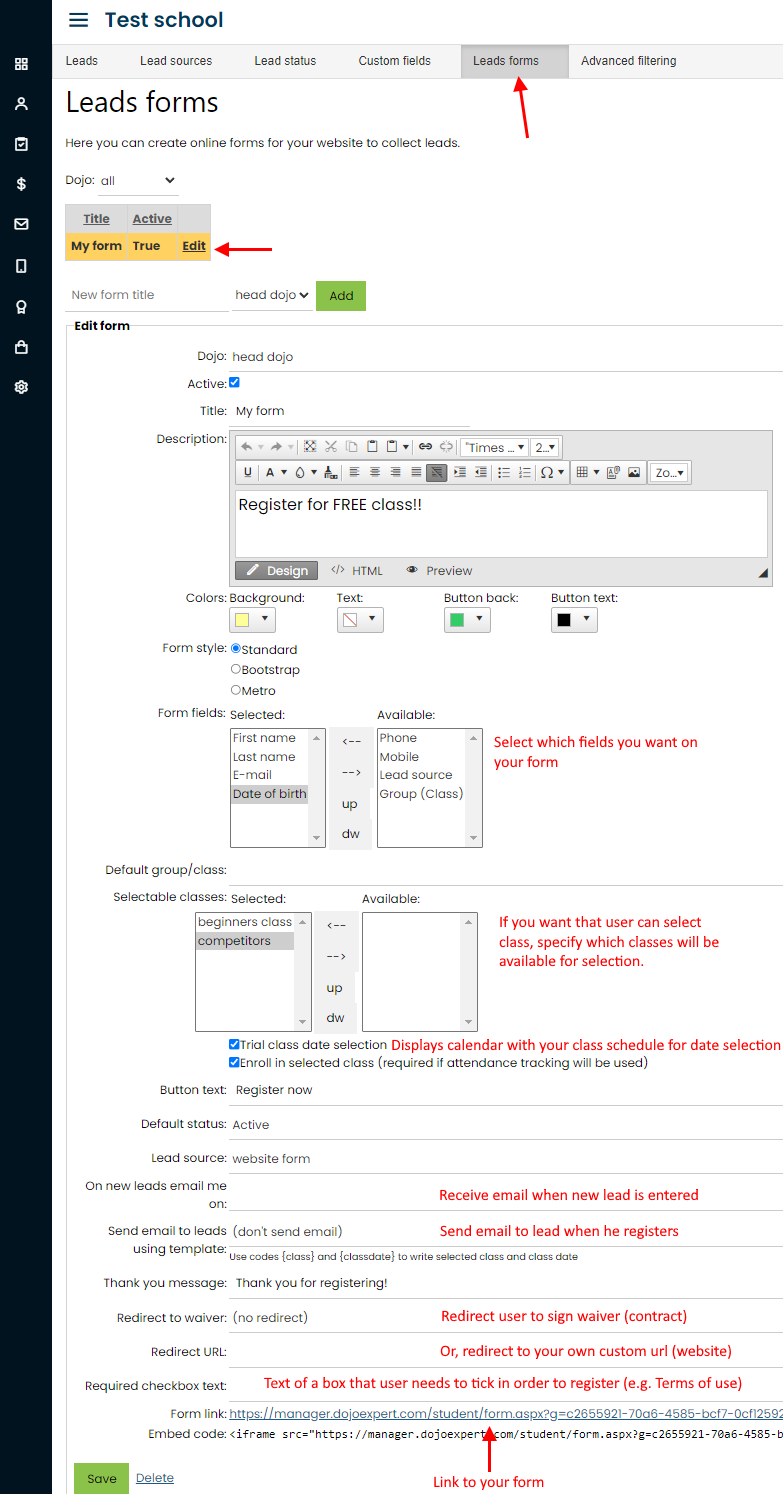
At the bottom, you will find a form link and embed code. Email the link to prospective members or use the code to embed the form on your website. Here is an example:
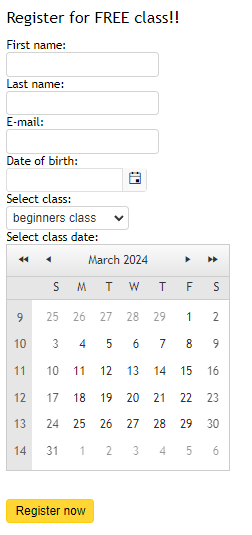
Everyone who submits a form is added to your lead database, where you can track further actions. Use advanced filtering in the top menu to filter leads by any field.